
How to Seamlessly Join PVC and EPDM Pond Liners Using Oase Products
Creating or expanding a pond often involves working with different types of liners—most commonly PVC and EPDM rubber. While both materials offer durability and flexibility, joining them together requires proper tools and technique. Oase offers professional solutions for bonding pond liners of the same material together.
In this guide, we’ll walk you through how to join PVC and EPDM pond liners using:
- Oase PVC Liner Adhesive 250ml – for joining PVC liners together.
- OaseFol Primer (0.75L) – surface cleaner & preparation for seamtape or flashing.
- Oase Seamtape 76mm x 30.5m – Seam joining tape for EPDM liners.
Why Joining Liners Matters
Whether you’re extending an existing pond, integrating a stream or waterfall, or simply using leftover liner materials, knowing how to securely bond different types of pond liner ensures a leak-free and long-lasting result. Improper bonding can lead to costly repairs or water loss.
What You’ll Need for joining PVC Pond Liner
Materials:
- OASE PVC Liner Adhesive
- Clean cloth or towel
Optional:
- Roller (for pressing the seam)
- Gloves for safety
Step-by-Step Guide
Step 1: Clean the Surfaces
Begin by thoroughly cleaning both liner surfaces where the seam will be applied. Remove all dirt, dust, oils, and moisture. This step is critical to ensure strong adhesion.
Use a clean cloth and, if needed, a mild cleaner (avoid anything too harsh or oily) to prepare the surfaces.
Step 2: Apply OASE PVC Liner Adhesive
Apply a thin, even layer of OASE PVC Liner Adhesive to both liner surfaces using the integrated brush inside the lid. This high-quality film adhesive ensures secure bonding of film sheets.
Step 3: Join the Liners
Carefully position the second liner over the first. Use a roller or your hands to create a tight, bubble-free seal along the entire seam. 250ml of adhesive is sufficient for 1m2 of liner adhesion.
We generally recommend to let the seam cure for at least 24 hours before filling the pond with water, giving the adhesive time to reach full strength.
Tips for Success
- Work in temperatures between +5 and +30c. Cold or damp conditions can affect adhesive performance.
- Store your materials out of direct sunlight and use them before their expiration dates.
What You’ll Need for joining EPDM Rubber Pond Liner
Materials:
- OASE OaseFol Primer 0.75L
- OASE SeamTape
- Clean cloth or towel
- Roller (for pressing the seam)
- Gloves for safety
Step-by-Step Guide
Step 1: Clean the Surfaces
Begin by thoroughly cleaning both liner surfaces where the seam will be applied. Remove all dirt, dust, oils, and moisture. This step is critical to ensure strong adhesion.
Use a clean cloth and, if needed, a mild cleaner (avoid anything too harsh or oily) to prepare the surfaces.
Step 2: Prepare the overlapping joins
Mark a line on the first liner at a minimum of 10cm from the edge. Drag across the second liner, overlapping the liners to the marked line. Mark a second dotted line 1cm further away from the edge of the first liner.
Fold back the second liner in preparation to apply primer.
Step 3: Apply OaseFol Primer
Apply a thin, even layer of OaseFol Primer to both liner surfaces using a brush or sponge. This primer helps prepare and activate the surfaces for maximum bonding with the seam tape.
Let the primer dry completely—this usually takes about 5–10 minutes, depending on ambient temperature and humidity. The surface should feel tacky, not wet.
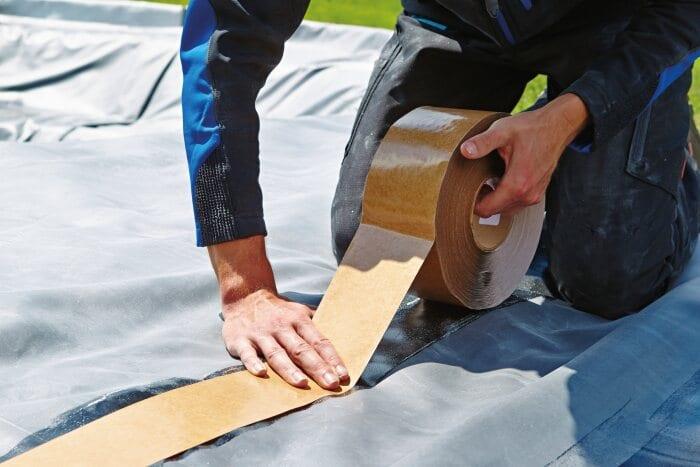
Step 4: Cut and Apply Oase Seamtape
Measure and cut a length of Oase Seamtape to cover the seam area, leaving a few extra centimetres on either end for security.
Peel back a small section of the protective backing and begin applying the tape to the first liner surface, following the second dotted line. Use a roller or firm hand pressure to ensure the tape is pressed down evenly with no air bubbles.
Step 5: Join the Liners
Carefully position the second liner over the tape. The SeamTape should underlap the seam by approximately 1cm. Remove the remaining tape backing bit by bit while pressing the second liner firmly into place. Again, use a roller or your hands to create a tight, bubble-free seal along the entire seam.
Step 6: Final Pressure and Check
Once the two liners are bonded, go over the seam again with firm pressure. You want to ensure full contact across the entire seam.
Let the seam cure for at least 24 hours before filling the pond with water, giving the adhesive time to reach full strength.
Tips for Success
- Work in warm, dry weather if possible. Cold or damp conditions can affect primer and adhesive performance.
- Always allow primer to dry before applying tape.
- Store your materials out of direct sunlight and use them before their expiration dates.
Final Thoughts
Bonding PVC and EPDM liners can seem intimidating, but with the right products and a little patience, it's entirely achievable. The combination of OaseFol Primer& Oase Seamtape for EPDM and the Oase PVC liner adhesive for PVC offers a professional-grade solution that’s both durable and waterproof.
For peace of mind and the longevity of your pond, trust in quality materials and follow these best practices to ensure a watertight seal that lasts for years.


